Thursday, December 14, 2017

The End of the Fontastic Adventures :-(


Katie and I met one more time to finish up our font unit. This was actually a really fun meeting because we both realized what a powerful tool Illustrator can be when it isn't so frustrating! To finalize our letters, we took our recreated letters and deleted the rounded letters behind it. We then focused on finalizing all of our serifs so that there would be consistent patterns between groups of letters. We matched the serifs on the left side of the B, D, and F. We used two upwards facing serifs on the bottom of the A, H, M, N, R and X. We kept the two, fang-like serifs on the top of the I, J, and T the same, mimicking that serif at the bottom of the L. We wanted more of a motif of the upward facing serifs on the top of our original E, so we added upwards-facing serifs at the top of our F, G, U, V, W, X, and Y. We also wanted to continue the zig-zag, lightning-shaped accent in the Q, so we added that element to the A, O, and Z. The small changes we made created a more jagged feel for all the letters, as well as a more uniform alphabet overall. 
Our final font!!!

Our font with the Yeti dude!
Yeti Dude is back!
Our font with the escape room logo again
Our standalone logo
We also revised our Artists' Statement: 

Our font, entitled “Rune”, is designed as a title font for the Yeti expedition themed WPI escape room. Our purpose in designing this font is to not only create a font that can be used on the different forms of advertisement for the escape room, but also to create a font that will entice readers that register for and enter into the “Revenge of the Yeti”. Our audience is current WPI students as well as WPI faculty, and our goal was to persuade viewers that the escape room is a harsh, cold Yeti expedition. Much of the design influence for this font came from ancient runes, hence its name. Rune combines singular straight lines to form its upper and lower case letters, similar to Western Greek and Archaic Etruscan alphabets. The letters “K”, “L”, “B”, “M”, and “N” from the Etruscan alphabet particularly influenced our design choice to include serifs on some of our letters as well as to turn the rounded edges of letters such as B, D, G, and O into diamonds. In particular, the letter R heavily influenced our design choices. We decided to extend the letter to resemble a mountain for one of our logos, which gave the edges an overall sharper feel. We continued this sharp motif in the other letters to give them a fractured, hand drawn feel. We wanted to portray a wood-carven appearance, as if someone had used a Swiss Army Knife to carve the alphabet into wood. We also wanted to create sharp, icicle-like serifs to remind the viewer of the harsh hold of the mountain. Rune serves as a caution to readers of the surprises that await on the mountain.

At first, I was honestly kind of dreading this revision, but now I am so glad that we did! It looks SO much better, and it really brought me full circle in this class and showed just how much I learned through Visual Rhetoric. Here are just a few things I took away from this course:
  • Don't be scared of using "big girl" programs like Illustrator and Photoshop - they are SO powerful and a lot of your questions can be answered by Google search!
  • You can re-imagine a project in a bajillion different ways! There's no limit to a genre when you have your imagination and a fresh perspective.
  • You could work on a design project for years and still not feel like it's done. There is always room for improvement.
  • EVERYTHING is working to convince you, and you can consciously work to convince others.
  • Design is SO HARD and I give designers SO much credit (something I knew before but didn't fully realize until this course).
  • Design can be frustrating but it is SO FUN and you can do so much with a simple idea and a good imagination!

The Final Map!

So since last class, Madeline and I really took everyone's feedback into account and decided to re-vamp our map to make it more visually pleasing and to have it serve our purpose better. We put our map into illustrator and traced over the sections that we wanted to include in our map - the sections that we had a lot of data and we knew WPI students lived. We also traced over the WPI campus, part of Becker, Elm Park, and Institute Park to give our map some perspective and show the viewer the close proximity of off-campus apartments to WPI. We only re-labeled Highland Street and West Street, two streets that we thought might be hard to infer by just looking at sections of a map. We decided that, instead of plotting points at certain addresses based on our data, we would extrapolate (i.e. sort of make up) that data into areas we know WPI students live so that students could see both price range and population density of a particular area. We did this by modeling our map after a heat map, with different colors representing different price ranges.
Our heat map inspiration! Source: https://community.tibco.com/questions/creating-geo-heatmap
We also changed the background colors. We used muted, lighter colors in the background so that our brighter, heat map colors would stand out more. We used muted tones of WPI and Becker's school colors to denote the land area those two schools owned, and we used a muted gray for the surrounding area where no WPI students lived. We decided to include reliable landlords and their contact information, WPI's Office of Residential Services who can help figure out how to move off campus, and wpi.jumpoffcampus.com, the website Maddie and I used to find our off-campus apartments.
Our final map!
One of the most rewarding parts of this project was when a first-year student saw our map and told us how helpful it would be. Her comment showed us that we were on the right track with our ideas and that this could actually be a useful product!

Here is our artist statement:

We were assigned to create a map of ‘something’ in Worcester. Immediately,we were tempted to make a map that was a technical tool for people to use to traverse through an area to get from point A to B, but after learning about the use of conditional rhetoric used in maps, we recognized our power as cartographers to create a map that acted persuasively. We decided to create a map of off-campus apartment options around WPI. “Off-Campus Apartments Around WPI” is a map that shows the price ranges of off campus apartments in WPI’s surrounding area, as well as the how many students live off campus in the surrounding areas. We modeled our map after heat maps, a genre of map that viewers would be familiar with.We chose bright colors to represent each of our price ranges, similar to how heat maps use neons to denote different temperature ranges. We used a muted grey for the areas that were not occupied by WPI students so that the densely populated areas would stand out, and the viewer would easily be able to see where WPI students are living. We only used major street names so that viewers could see general trends in sectors of the surrounding area. Viewers will look to the side panel for the map key and see the additional information we included below the key, which includes reliable landlords and more resources. We intend our map to be used by current WPI students who are unsure about where to look for apartments in their price range, and what resources to use while searching for off campus apartments. Many students and their parents are concerned about the pricing of apartments, as well as who the students’ neighbors would be. Our map works to show the likelihood of having a WPI student as a neighbor, and the wide range of prices these apartments could be. 


Wednesday, December 13, 2017

TBT to the Comic!

Katie and I both really loved the comic unit. Professor DeWinter had some really awesome suggestions for improvement, so we decided to revise our comic to try to make it as funny, effective, and awesome as possible. We decided to add a seventh panel with an information graphic, reviewing what was said about the depth and breadth requirements. We wanted to include this quick review because we knew our text was more creative story telling than information. We made the infographic in powerpoint and then moved it over to Google Slides to add the picture of Gompei and the speech bubble. We also decided to include our selfie and our names, grad years, majors, and depths so that students reading our comic would identify with students and feel comfortable getting the information from us. Here is our new slide:

I look like a thumb lol
We also revised our artists' statement to be more accurate to our revisions:

In our comic, “A Tour of the HUA Requirement: The Breadth and Depth Path”, we are targeting prospective students and first-year students that have already enrolled at WPI and are exploring their Humanities and Arts Requirement options prior to course registration. Our purpose in creating this comic is to explain the breadth and depth option of the HUA requirement, since it is one of WPI’s most confusing and diverse graduation requirements. In our comic, we include a sample breadth and depth schedule to give students an example path they could follow. The story of the comic follows a general overview of this particular HUA option interlaced with the breadth and depth classes that Gompei, the star of our comic, took. We chose to use WPI’s mascot as the main character in order to create ethos with the reader. Since our audience is students interested or enrolled in WPI, it is likely that they know that Gompei is our mascot. Using him as our comic’s main character will create a shared character of school spirit, as our school’s mascot fills us all with a sense of pride. At the end of our comic, we added testimonials from current WPI students that explained why they benefited from this option. We decided to add students’ personal stories to the comic to show why WPI students like having the humanities as a part of their education, even though WPI is considered a tech school. As students, we are more likely to choose a class or humanities path based on the recommendation of our peers, since we trust their advice. These personal stories will appeal to the readers since they are also students, and students are always more likely to listen to students rather than to an advisor or someone seen as superior. As neither of us have much artistic talent, we decided to superimpose pictures of Gompei that we drew on top of various locations on WPI’s campus that we photographed. These pictures will be familiar to the audience, further creating ethos. Readers will be able to relate to the comic since they have seen the campus locations we have included, giving that familiarity and a further sense of shared school pride. On the final comic panel, we added an infographic to summarize the breadth and depth HUA option. Since our comic is not purely informative and informational, we felt that this infographic could quickly show readers how to complete this option. On the same panel we included a selfie with a quick “about the authors” blurb. We felt showing that WPI students wrote this comic would strengthen the readers’ connection with it. Our comic is meant for two different mediums, online and print. It could be put online as a series of panels on the humanities and arts website, or be printed as a poster panel or a pamphlet that would be distributed at Accepted Students Days or before course registration.

Fonts REEEEMIIXXXXXXX

For our final project, Katie and I decided to revise our font project, the project we definitely struggled with the most. Professor DeWinter gave us some great feedback on our first submission, and we knew it need a lot of tender, loving care so we decided to take another stab at our design.
Here's our OG font! #straightouttaeverest

This time, we really wanted to clearly define our influence and explain our reasoning for choosing our designs. We definitely didn't draw that much influence from the Nepali language, instead mainly deriving our influence from runes, the Mount Everest base camp sign, and words hand-carved into wood.

 
The Greek and Etruscan Alphabets are rune languages we got a lot of our influence from. Source: https://en.wikipedia.org/wiki/Old_Italic_script
Our inspiration for the use of sharp serifs came from this Everest Base Camp sign, the last sign explorers see before they make their ascent to the Base Camp. Source: https://www.pinterest.com/pin/407927678724141808/
A lot of our sharp lines were inspired by wood carvings. I picture an explorer trying to leave a warning to the people who would come behind him about the dangers that lie ahead. Source: http://www.forloveorfunny.com/wp-content/uploads/2011/05/IMG_5685.jpg 
We decided to continue to use illustrator to edit our font. With our defined influences, we focused on sharp corners, sharp edges, and sharp serifs. We used the handy dandy pen tool to trace over our already existing letters, recreating the letters using straight lines. This was a particularly long process in the beginning, but after a while we really got the hang of it and were cranking out new letters like it was nobody's business. We want to add some new elements to some of the serifs, so we are going to meet again later to continue work on the font.

Overall, although Katie and I agreed that the font project wasn't our favorite, we really enjoyed getting to go back and spend a lot of time revising our project so that it is more effective, knowing what we know now about visual design. I think our revised project will be a lot more effective than our first submission.

Monday, December 11, 2017

Mappin' out the woo!

Following hot on the heels of the comic unit, we entered the MAP UNIT! We read two really informative readings that helped define the unit. One was by Kitchin and Dodge and it focused on defining maps as a type of Visual Rhetoric. The other by Miles Kimball focused on Charles Booth's map of poverty and how it shaped the Western view of poverty in the 20th century. It was pretty crazy stuff - it showed how Maps truly were interpretive forms of Visual Communication / Rhetoric, and how the artist's biases has a HUGE impact on the viewer's interpretation. 

For our projects, we were to utilize the visual rhetoric and communication aspect of maps and our unique perspective as WPI students to tell a story about Worcester through a map. I partnered up with Madeline Zomb for this project. When we first met, we decided to start brainstorming some ideas. We came up with the idea of a crime map to show which areas to avoid, but we thought that might be too depressing (and scary!) to research. Luckily, Madeline started looking at apartments, and felt a lot of frustration using Jump Off Campus to research apartments, so we decided to focus on local off-campus apartments in Worcester. 

For our first draft, we used the data from the Jump Off Campus Map.

This is the Jump Off Campus map. You have to mouse over the points to get the price ranges. Source: https://wpi.jumpoffcampus.com/map?location=

But then we decided that our first version was #lame and looked way too sparse for the amount of people who actually lived in that area. So we decided to send out a survey to our sororities and sports teams to get some more data points to plot.

Our expertly crafted google form!
 We ran into a few snags with our form:

  • Our ranges weren't specific enough: for example, someone with $400 for rent could pick two answers and still be right.
  • We didn't specify whether rent included utilities or not, which caused some confusion for survey takers.
  • People didn't put in their whole addresses so we couldn't accurately plot those points.
  • People thought it was for the CIA. 
The CIA does frequently use google forms to solicit information from unsuspecting college students.
We plotted the results of the survey to get our first draft! We used one row of colors from Google Drawings so that they would be the same shade of green through red. We put $400 or less as green because generally us poor college students think cheaper apartments are something you want to GO for. We used dark red as the most expensive properties because high housing prices could put college students "in the red". We were glad we got so many responses from our survey because it made the area look a lot more inhabited by WPI students, something that I know my parents were worried about when I moved off campus.

A rainbow of color! 
We brought our drafts in today to get feedback - a lot of people said that they really liked the use of colors to denote different price ranges and it was visually helpful. That being said, however, not many people found it very visually pleasing. A lot of our feed back was about the two reds being quite similar and our colors being kind of bland and our background not doing anything to continue the story we are trying to tell. We are going to have to work really hard to create a fresh new take on this map, but I think it's going to come out awesome!

Thursday, December 7, 2017

The Final Comic

MAN WE FINISHED! Since the initial #GloUp of our comic, we tweaked some stuff to make our comic a bit more polished. Last Thursday, we projected our projects and talked about changes we could make to improve them. We got some comments about the layout of the frames of our comic - a lot of them were uneven and lopsided. The text in our speech bubbles was a really heavy, masculine text that was not centered or formatted correctly at all. And one of our Gompeis had his WPI shirt on backwards! Classic Gomp!

We also wanted to end our comic with more student interviews, which were a huge hit according to the comments from our classmates. We wanted to interview students from different HUA backgrounds too, because all three of the students we initially interviewed did their depth in history. We did some extensive facebook stalking and found some photos of our friends, asking them for more quotes to diversify our comments.

We also spruced our comic up, making sure all of our photos were clear and all of our lines were straight up and down. We spent a looooong time changing font sizes so they were less wildly different. And then we read through the comic again and found MORE mistakes so we went back and fixed those. BOOM CHICKA POP we got it done!

Gompei suitin up in style!

Gompei Kuwada is actually the name of the person who kept Gompei the goat on campus. Gompei (the person) didn't name his goat, so WPI named our mascot after him.

Gompei the conductor!

Gompei is actually both a land mammal and a sea mammal!

Please note the picture of the screen of us working on this frame. Just for LOLs. 
HUGE shoutout to all the people we facebook stalked for these interviews!


We crafted our artist statement as well:

In our comic, “A Tour of the HUA Requirement: The Breadth and Depth Path”, we are targeting prospective students and first-year students that have already enrolled at WPI and are exploring their Humanities and Arts Requirement options prior to course registration. Our purpose in creating this comic is to explain the breadth and depth option of the HUA requirement, since it is one of WPI’s most confusing and diverse graduation requirements. In our comic, we include a sample breadth and depth schedule to give students an example path they could follow. The story of the comic follows a general overview of this particular HUA option interlaced with the breadth and depth classes that Gompei, the star of our comic, took. We chose to use WPI’s mascot as the main character in order to create ethos with the reader. Finally, we added testimonials from WPI students that explained why they benefited from this option. We decided to add students’ personal stories to the comic to show why WPI students like having the humanities as a part of their education, even though WPI is considered a tech school. As neither of us have much artistic talent, we decided to superimpose pictures of Gompei that we drew on top of various locations on WPI’s campus that we photographed. These pictures will be familiar to the audience, further creating ethos. Our comic is meant for two different mediums, online and print. It could be put online as a series of panels on the humanities and arts website, or be printed as a poster panel or a pamphlet that would be distributed at Accepted Students Days or before course registration.

This was definitely my favorite project so far! I think it was partially because there was such an exigence for Katie and I to create a comic about the HUA requirement - as tour guides, we get SO many questions about the requirement. We used a lot of tactics we use in tours, and I think overall it's very effective!

Monday, December 4, 2017

Comic #GloUp


WOW long time no blog! Since the last time I blogged, Katie and I met TWICE and our comic has had a MAJOR glo-up. I'm going to use the blog post to showcase our process and some of our struggles when creating the final first draft!

So our first step was creating the storyboard, which I outlined in the last blog post. Here's an example of our of our storyboard draft ideas.
We were going to use the picture under the bridge when we wrote this lol
 Next, we finalized our photo choices and added the speech bubbles and borders to the pictures using drawings on Google docs.
It was a beautiful day when we decided to take these pictures, and my iPhone camera did quite well!
 Katie and I both traced different Gompeis in different poses and outlined them in marker so they could be easily traced in Illustrator. Katie worked her Illustrator and Photoshop wizardry (she totally mastered the lasso tool which was giving us extreme stress during the infographic unit!) and then we put our traced/lassoed Gompei into the frame.
Gompei striking a ~fabulous~ pose
 Then we put the frames into Google slides and arranged them on the slide so they looked decent and the flow made sense to read.
YEAH!
While we struggled a whole lot less with Adobe suite, we hit a whole lot of bumps in the road. We did a lot of our design in Drawings in Google docs, without knowing that you couldn't copy and paste those into Google slides. Thankfully, the snipping tool ROCKS, and we snipped the heck out of this project. Then we had to layer the borders over the photos by drawing rectangles over the images. There was a lot of struggling with the sending to front/sending to back in the Google format (kinda wish they had layers like in photoshop).

But, despite a LOT of time being spent on transferring photos from one media to another, we got a lot of positive feedback today in class! Some of the constructive feedback included making the fonts bigger and making the frames more even in our layout. We also need to revise some of our Gompeis to make them look less weird (and flip the lettering we forgot to flip on one of Gompei's shirts). We have a lot of work left to do, but we are on a good path so far!

Wednesday, November 29, 2017

Comic Unit Kickoff!

Today, Katie and I met to start our comic book. We had both previously read three comics, one instructing readers on how to use google chrome, the other on the history of freud, and the third on the untapped capabilities of comics and a genre. I was especially interested in the third comic, which detailed how comics could be used. I had no idea the power of comics, but they really can operate on two levels: not only telling readers what they mean but showing them as well. This is really really effective for storytelling, and also for instruction.

We were tasked with creating a comic that informs the reader about the humanities and arts requirement at WPI. The requirement is definitely a struggle for a lot of new students at WPI, so we decided to cater our comics for first year WPI students. We also had to make sure that our sponsor, Kristin Boudreau aka the head of the Humanities and Arts department, would be satisfied with our final project.

Since Katie and I are both tour guides, we wanted to do a sort of "tour" through the humanities and arts at WPI. We chose Gompei the Goat as our tour guide - a figure that all WPI students would be familiar with, creating ethos. Our Gompei character is a student who had already completed his HUA requirement, so he can pass on his sage advice to new students. Neither of us are super good artists, so we wanted to start by creating a storyboard:

A tour of the Humanities and Arts:

Gompei - Main character

Audience - Incoming first year students

Purpose - Explain the goal of the requirement, what the requirement is, and how to fulfill the requirement and example registration.

Intro frames:

  • Gompei introduces himself like tour guide “Hey, my name is Gompei! Welcome to WPI!”
    • Gompei under the bridge
  • Gompei: “Here at WPI there are a few graduation requirements, and one of these is the humanities and arts project”
    • Gompei in front of MQP IQP HUA holding HUA in block letters
    • Can separate this into two frames
  • Gompei pointing at title of the webpage
  • Source: https://www.wpi.edu/academics/undergraduate/humanities-arts-requirement
  • “A popular way to fulfill this requirement is by complete a “depth” and a “breadth”
    • Scale with depth on heavy side, breadth on light side
  • You pick your depth and breadth from five different areas of study
    • Gompei gesturing to the five areas of study
    • Source: https://www.wpi.edu/sites/default/files/inline-image/NEW%20updated%20for%20WEBPAGE%204-7-2017%20HUA-Brochure-Aug2013-Web.pdf
  • Your depth is three or four courses in one of these areas. You should choose something you’re really interested in for your depth! As a goat, I am very interested in philosophy, and like to ponder plato as I chew on my grass in the morning.
    • Gompei chillin on the grass
  • Your breadth is one or two courses outside of your main area of focus. You should choose courses that you want to try in different subject areas.
    • I love WPI’s fight song, and I wanted to learn how to make music just like it, so I took a music course!
      • Pic of gompei singing!
    • I also want to do my IQP in Paraguay, so I took an introductory spanish course!
      • Pic of gompei in paraguay?
  • After you do your depth and your breadth, you get to take part in a capstone project in your depth area.
    • Pic of just gompei
  • This capstone project could be either a seminar or a practicum
    • Pic of gompei with seminar and practicum in either hand
  • The seminar allows students to dive deeper into their depth area by looking at a complex, humanistic problem or theme.
    • Gompei in dive gear under the sea w/ sebastian the crab from ariel
  • Students with their depth in writing, music, and drama/theater can do their capstone project as a practicum, a hands-on project where students will be involved in the production of something, such as a play, a piece of music, or a book.
    • Gompei at a theater
  • "Something helpful that I used in my HUA experience is the Humanities and Arts tracking sheet"
    • Source: https://www.wpi.edu/sites/default/files/inline-image/NEW%20updated%20for%20WEBPAGE%204-7-2017%20HUA-Brochure-Aug2013-Web.pdf
  • "Be sure to ask your advisor if you have any questions!"

We are planning on meeting today to figure out what programs we can use to create this comic! I think it's going to turn out really cool.

Sunday, November 26, 2017

The Finished Product!

I just got back from our post-thanksgiving meeting, where we finished our fabulous infographic! We took a lot of the critical feedback from the class into account while we were making our edits.

This is the draft we showed the class

Here's our final product!
We converted the file from the piktochart file to illustrator. Natasha, our resident illustrator wizard, redrew all the shapes to our needs. She also added some cool new characters by tracing and editing stock photos. We thought that our first draft had a lot of white space, so we used a light gray background that matched our color scheme. I honestly think that the gray helps make the graphic look so much more professional and make all the icons pop. We also all agreed that the color scheme was a bit masculine, so we used a more feminine font. We made all of the font on the signs a LOT bigger, which proved a little tricky in illustrator. 

We thought that "serve" would be a much more professional way to say "save lives". We also streamlined the information by adding a lot of it towards the bottom of the infographic under the corresponding icons, and we were very particular about the information we kept on the graphic, and the information we took off. We worked really well together finalizing the graphic and combing through our artists' statement, and had a lot of really productive discussions about word choice and word placement, which I thought was really fun and engaging.

Here is our artists' statement:

“The Road to WPI EMS” targets WPI students who want to join WPI’s EMS. WPI’s EMS is a club that is known campus wide for being first responders to medical emergencies. However, there is very little information readily known about the organization. Our infographic serves to explain the process to become a general member of WPI EMS. The visual we are most proud of is a word cloud in the shape of an ambulance driving along a road. We made the word cloud using the most frequent vocabulary words from the WPI EMS website. This visual serves to direct the viewer along a path that sequentially iterates the steps a student must take to become a part of WPI EMS. We included road signs to display these steps and to bring the viewer’s eye down the winding road. The final sign has the recognizable shape and color of a stop sign with the WPI EMS logo inside it. The sign indicates the end of the process to become a general member. Behind this stop sign is a cartoon human jumping for joy. They hold an EMS badge in their hand to show their excitement in achieving membership. We used visual cues at the bottom of the infographic to summarize the application process and to provide more information about it. There is a figure performing CPR because knowing CPR is one of the qualifications needed to apply to WPI EMS. The WPI EMS symbol on this figure has the WPI crest inside it, a recognizable logo which creates ethos. Walkie-talkies are used because they are one of WPI EMS’s main forms of communication. Using the cartoon-like people was intentional -- they are colorless and genderless so that all WPI students can picture themselves as a member of WPI’s EMS. We chose our color scheme from WPI EMS’s colors: navy, red, grey, and white. These colors are slightly masculine, so we balanced them with a thinner, softer, more feminine font. This serves to attract both genders to the organization.

I'm really really proud of how the graphic turned out, and I am really excited to send it to WPI EMS! Who knows, maybe we will see it around campus!


Friday, November 24, 2017

First Draft of Infographic and Critique time!!!

SOOOOOO we have our first draft of our EMS infographic! (I'm posting this a little late because I decided combine two posts into this one.)

My group partners and I worked really well together in collaborating ideas and designs to create our infographic. Katie was a wizard using Piktochart, Natasha created the road on illustrator, and I wrestled with photoshop to help remove the white background of the ambulance. 

Our #lit first draft
In our first draft, we tried to incorporate some of the comments that our classmates made on our blogs. One of our classmates said we should avoid dehumanizing our data by adding some sort of stick figure, which we tried to incorporate. Another classmate suggested we add the non-emergency line in so that potential applicants can call with any questions, and also making the website and

In class on Monday, all of the groups brought in their drafts and we discussed each of our drafts which was SUPER friggen helpful. The class really liked the idea of the road with the signs, but thought that the font was much too small and there was too much information for such small signs. The class also really liked the big icons on the bottom, and suggested maybe we should add more information there. Professor deWinter also said that our header looked a bit like an FDA warning and that we should focus on simplicity up top and add more detail towards the bottom of the infographic.

My group and I took copious notes throughout our critique and sketched out our approximate revisions so we could hit the ground running when we meet on Sunday.

Please excuse my artistic skills
We definitely want to move the bulk of the information down below the icons. We still haven't figured out where to put our quick intro to the club but it will probably be somewhere towards the top of the infographic. We want to change all the font to be bigger and all the lil people to be a uniform type of person. The road should provide a quick overview of the application process, and then readers can get more information below the icons.


Thursday, November 16, 2017

InFUNgraphics - a brief intro to the infographics unit

After the font unit, I started to feel like a real ~graphic designer~ so I was so excited to start research for the new infographic unit.

One of the readings we were assigned, Dragga and Voss's article Cruel Pies: The Inhumanity of Technical Illustrations heavily emphasized the humanity behind technical images and graphics. While some of the examples they used seemed a little extreme (clip art to represent the deaths in Napoleon's army as they retreat?????), I totally saw the point that Dragga and Voss were trying to make. As an author, you really do have to keep in mind that Actual People will be using your graphics to gain information, so you have the ethical responsibility to give them a holistic view of the information.

And along the same lines, Tufte's article Envisioning Information points out that these infographics also actually have to be understood by actual people. Authors of infographics have to compose these graphics so that their audience can easily follow the information and be persuaded by the information. It sounds like a simple, kinda dumb concept, but if I think about all the times I've looked at a graphic and been terribly confused and wondered what sort of robot designed the layout. 

Keeping the wise words of these academics in mind, my group (Katie Vasconcelos, Natasha Levey) and I set out to start designing our infographic. We all wanted to focus on WPI clubs and organizations, but we knew we would have to narrow it down from that broad category. We started thinking about clubs that really did not get that much PR on campus, and WPI EMS came to mind. 

WPI EMS is a student-run club that was founded as part of an on-campus IQP. WPI EMS students are certified emergency first responders. They provide medical coverage 24/7 on campus, and they have relationships with several ambulance companies that can provide further hospital assistance as well. Students can receive more advanced certifications, and they can also get full time positions as an EMT at the Boylston fire department. 

So basically, they're badasses. One of my group partners, Natasha, and I went to talk to them while they were tablesitting and they're not only badass but also super duper nice! They just started their new recruiting season, and they seemed really excited that we were doing this project on their club.

After talking to the members, we decided to create our infographic directing our audience (the WPI student body) on how to apply to be an EMS. While brainstorming, we thought of the idea of doing some sort of fun word cloud, and decided to do it in the shape of an ambulance.

We decided on the theme "Road to EMS", sort of outlining the road that a student could take to become an EMS and also sprinkling in some facts about the club itself. I'm really looking forward to this project, and I'm excited to see how it turns out!

Monday, November 13, 2017

Collaborating for the Final Font

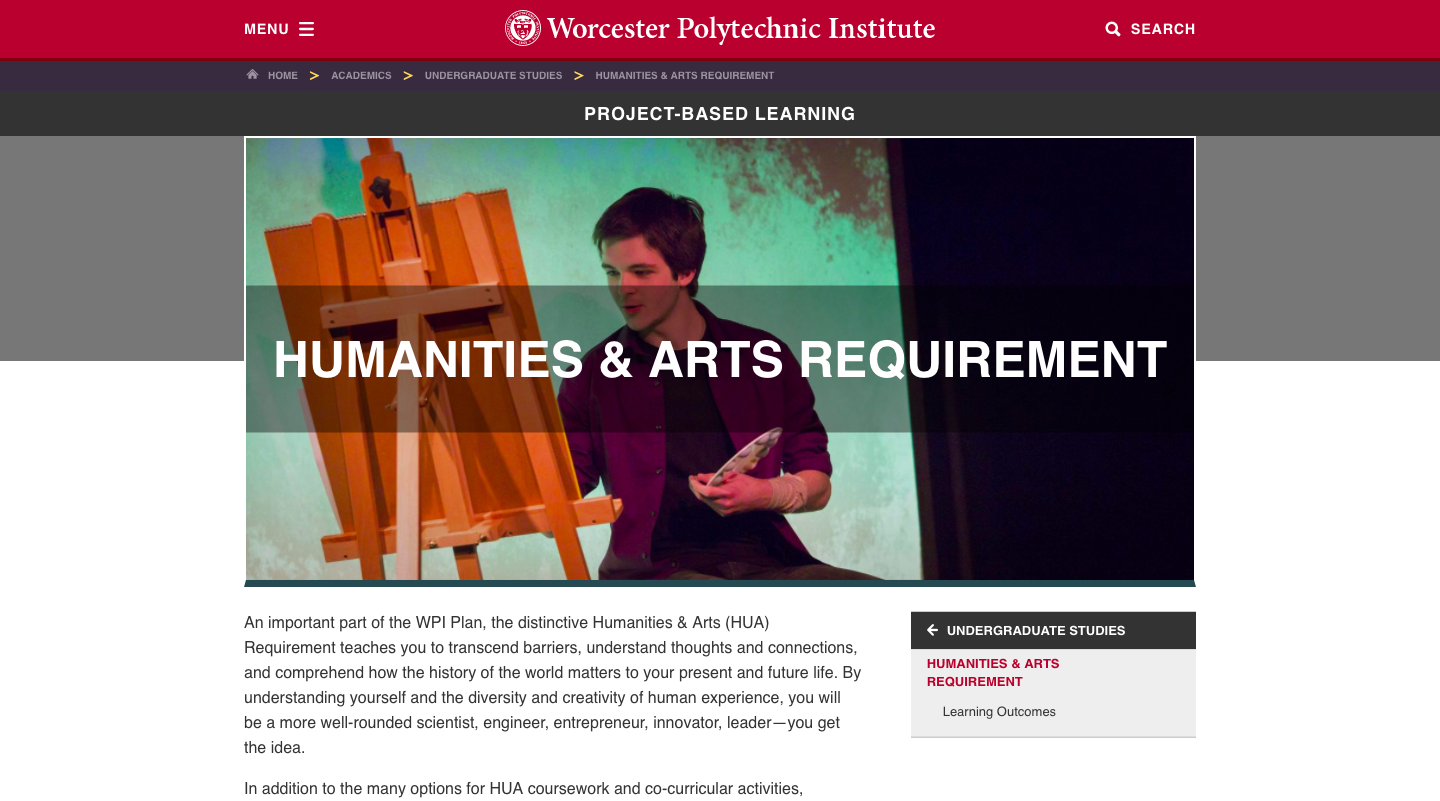
In class, we were able to meet with our sponsor to talk more about what the escape room is going to use our font for. He was really excited about the prospect of working with a unique student project for his escape room, which was so cool! He said that the escape room was timed, and participants had to escape before the Yeti caught up with them. The room would be designed like a rustic base camp, with a crudely built tent, fires, and furs. Our font would be used on the posters advertising the escape room, accompanied by the logo of the escape room.

After hearing about the escape room's concept, all of us students were able to share our preliminary fonts and the concepts behind the fonts. We then paired up based on the direction we wanted to take our fonts. Myself and Katie Vasconcelos paired up because we really wanted to start fresh based off of our sponsor's description of the escape room. We wanted to portray that rustic, Himalayan vibe in our font.

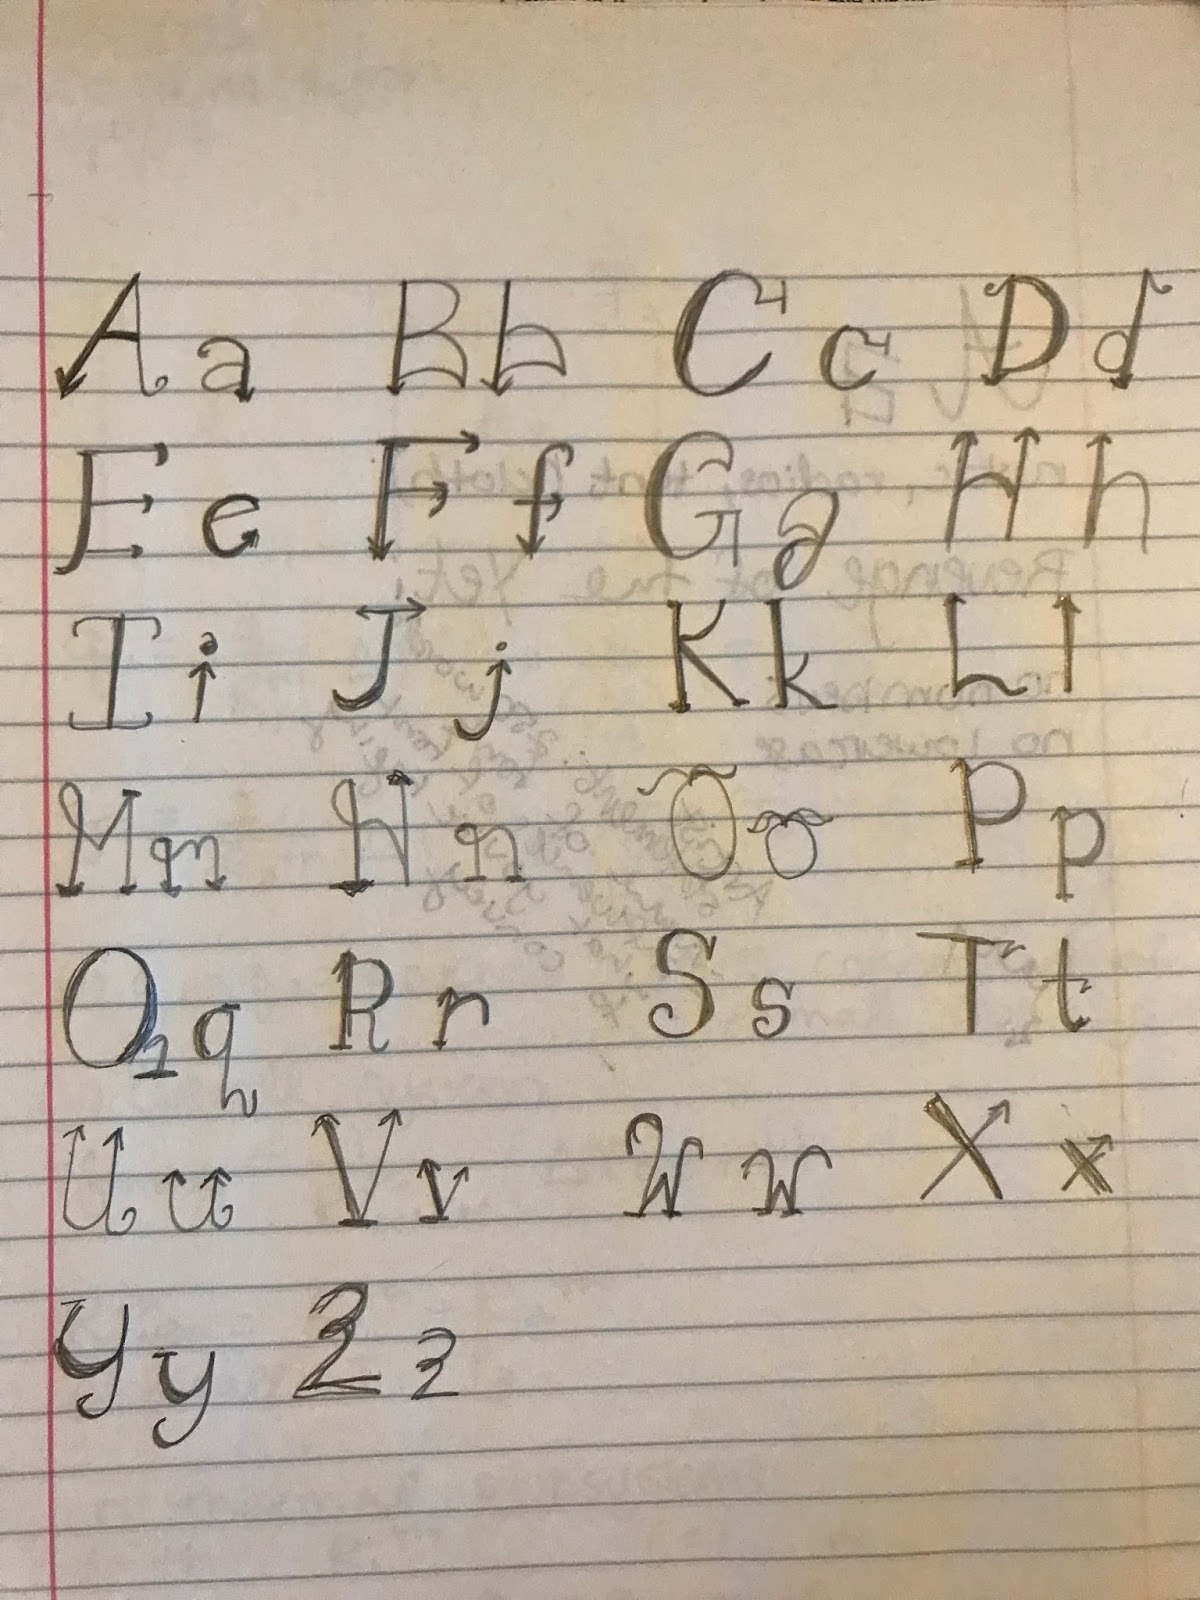
The process of creating the font was quite an adventure. We drew the letters out by hand and then scanned them into Adobe Illustrator. Once in vector format, we projected the letters up onto an overhead projector and perfected them to make sure they would look good from far away.

Slightly struggling

We wrestled with Illustrator for quite a while, but we finally got all of our letters to look satisfactory, and we were both really pumped with how all of our logos came out!

Our alphabet!

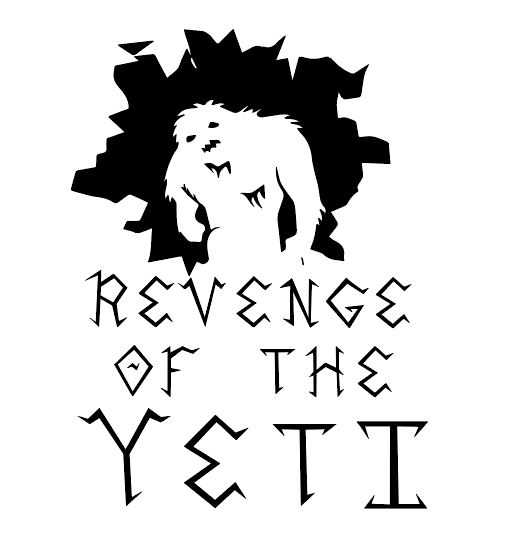
Banner format with the logo

Landscape layout for flyers

Portrait layout for flyers


Layout without the Yeti logo

We also composed an artist statement for our font:


"We designed our font, Rune, as a title font for a Yeti-expedition themed escape room. In designing this font, the goal was to entice WPI students to experience the “Revenge of the Yeti”. Some of the influence for the font came from the Nepali language. Each character in Nepalese has a straight line across the top, and each letter has both sharp corners and soft edges. Rune incorporates sharp lines and corners combined with slightly rounded edges and softer points. It resembles the jagged mountain tops, shown by the arms of the letters, the snow on the mountain, shown by rounded corners, and the harsh fangs of a yeti, shown by tooth-like serifs. The overall design of Rune, with its appearance of being carved into wood, resembles the final sign an explorer sees before ascending to the base camp of Mount Everest. Our font was originally hand drawn, much like a carved wooden sign, and then enhanced using Adobe Illustrator. The lines that compose each letter are slightly different, with serifs that are not the same size and downstrokes that are not completely straight to give the font a hand carved feeling. Rune serves to caution an explorer from imminent danger, while conveying the harsh cold and ancient surprises of the mountain."

Overall, this project was really awesome! It was challenging to develop a font from scratch, and I definitely have a newfound appreciation for font design. At the same time, it was an extremely rewarding and fun project. It's so awesome to be able to look at a fully formed logo that YOU created! I also was able to develop a much better understanding of how to use Adobe Illustrator, and I'm definitely looking forward to using it in the future, maybe to design posters for my own events!


Wednesday, November 8, 2017

Figuring Out Fonts

Now that I had a good understanding of Yetis and their habitat, I began to think about what my font should look like. I looked to a couple of different sources for inspiration. Being the innovative thinker that I am, I typed "Yeti Font" into my google search bar and this image was the first thing that came up:
Source: https://www.123rf.com/photo_43767905_stock-vector-yeti-font-vector.html

The little yeti dude is pretty cute and I really like the color scheme. But the design relies so heavily on the color scheme, I don't think viewers would see that the font is yeti themed if it were printed in black and white. The letters do remind me of partially melted ice cubes, but for me the resemblance ends there. 

The next font came from a hockey team's logo:
Source: https://www.logoarena.com/logo-contests/the-fort-nelson-yeti-n3145/15 

The font really only reminds me of a yeti because it literally has a yeti right next to it and it's a pale, icy blue. I don't think this font could stand on its own in black and white. It's too plane and basic, and not reminiscent enough of a yeti expedition. 

The next logo I found was a sticker for the popular cooler brand, Yeti coolers. 

Source: https://dribbble.com/shots/788063-Yeti?list=users&offset=34

This font was a cool interpretation of the Western cartoon style of the Yeti. I really enjoyed the thicker-set letters, reminiscent of the vastness of the Yeti, and the furry quality that the letters have. This font could be better for a logo with the yeti, but I wasn't sure if this style could bring the Yeti to mind if it were just standing alone.

Through a sudden brainwave, I thought of my favorite Disney ride, Expedition Everest. Disney is pretty much the gold standard for all things design in my opinion, so I was excited to take my newfound artist's eye to evaluate Disney's logos.

BINGO! Disney did it again! These two logos had the vibe I wanted for my font. 

Source: http://wondersofdisney.disneyfansites.com/clipart/logos/ak/ak.html 
I really liked the logo for expedition everest, especially how it incorporated the eyes of the Yeti and the mountaintop of everest. The font itself probably wouldn't immediately bring the viewer to think of the Yeti, but the overall logo is extremely effective.
                                    
The second logo (on the sign on the side of the mountain) seemed to draw influence from the Nepali language, something that I definitely wanted to incorporate. After my research, their font just screamed Himalayas.


Source: https://www.undercovertourist.com/orlando/disneys-animal-kingdom/expedition-everest-legend-forbidden-mountain/ 


Source: http://www.omniglot.com/writing/sikkimese.htm

I definitely wanted to incorporate the Nepali influence in my font. I took my unsteady artist's hand and tried my luck at designing the first draft of my font. I tried to base each of my letters on its corresponding Nepali letter.

Honestly, the overall lettering was pretty messy, but I am pretty satisfied with my first draft. I'm definitely looking forward to talking with our sponsor, and I'm really looking forward to collaborating with another student.